1. Login 페이지에서 아이디 비밀번호 오류
//Login.vue

methods: {
    loginSubmit() {
      //1. 아이디 비밀번호가 입력됐는지 확인
      if(this.email&&this.password){
        let saveData = {};
        saveData.email = this.email;
        saveData.password = this.password;
        try {
          this.$axios.post("/authenticate", JSON.stringify(saveData), {
            headers: {
              "Content-Type": `application/json`,
            },
          })
              .then((response) => {
                if (response.status === 200) {
                  alert("로그인 성공")
                  this.$store.commit('login', response.data)
                  this.$router.push({path: './home'});
                }
              })
              .catch(error =>{
                //2. 아이디 혹은 비밀번호가 틀렸을때
                console.log(error.response);
                if(error.response.status===401){
                  alert("인증오류. 아이디와 비밀번호를 확인해주세요");
                  this.password = null; this.email = null;
                }
               });
        } catch (error) {
          console.error(error);
        }
      }else{
        alert("아이디 혹은 비밀번호가 입력되지 않았습니다")
      }
      },
  }
1-1 아이디 or 비밀번호를 입력하지 않았을때
if문을 사용해서 아이디와 비밀번호가 있을때만 코드가 동작한다.
1-2 아이디 or 비밀번호가 틀렸을때
axios의 catch()문에서 오류 String값이 아닌 리턴된 object를 받고싶어서 아래 코드를 사용하였다.
자세한 설명은 다음 블로그에서 (https://sup2is.tistory.com/54)
.catch(error => {
    console.log(error.response)
});
status가 401일 때 비밀번호 오류 메시지를 출력하고 이메일과 비밀번호를 초기화시킨다.
2. 토큰 만료
  methods: {
    retrieveUsers(){
      this.$axios.get("boardjpa/list",{
        headers:{
          Authorization : "Bearer "+ this.$store.state.userStore.token
        }
      })
          .then(response=>{
            console.log(response.status);
            this.users = response.data;
            console.log(response.data);
          })
          .catch(error =>{
            console.log(error.response);
            this.$store.commit('loginCheck',error.response.status)
          })
    },
    inView(id){

      this.$router.push({path:'./board',query: {id}});
    },
  },
  mounted(){
    this.retrieveUsers();
  }
위와같은 방법으로 list를 가져올때 status를 store의 loginCheck로 보낸다.
Mounted()로 페이지가 로드될 때 마다 list를 가져오는 함수를 실행한다 ()
userStore
import router from '@/router'

const userStore = {
    state: {
        email: '',
        // userName: '',
        token: ''
    },
    mutations: {
        login: function (state, payload) {
            state.email = payload.email
            // state.userName = payload.userName
            state.token = payload.token
            console.log("after token? : " + state.token)
        },
        loginCheck: function (state, payload) {
            if(payload===401){
                state.token = null;
            }
            if (!state.token) {
                alert("로그인이 만료되었습니다.")
                router.push({ name: 'Login'
                }).catch(error => {
                    console.log(error)
                })
            }
        }
    }
}
export default userStore
각 Vue페이지에서 받은 상태값이 401(권한이 없을 때 오류) 이면 token값을 초기화하고
아래 if문에서 token값을 비교해서 로그인 만료 메시지를 출력, 그리고 Login화면으로 돌아간다
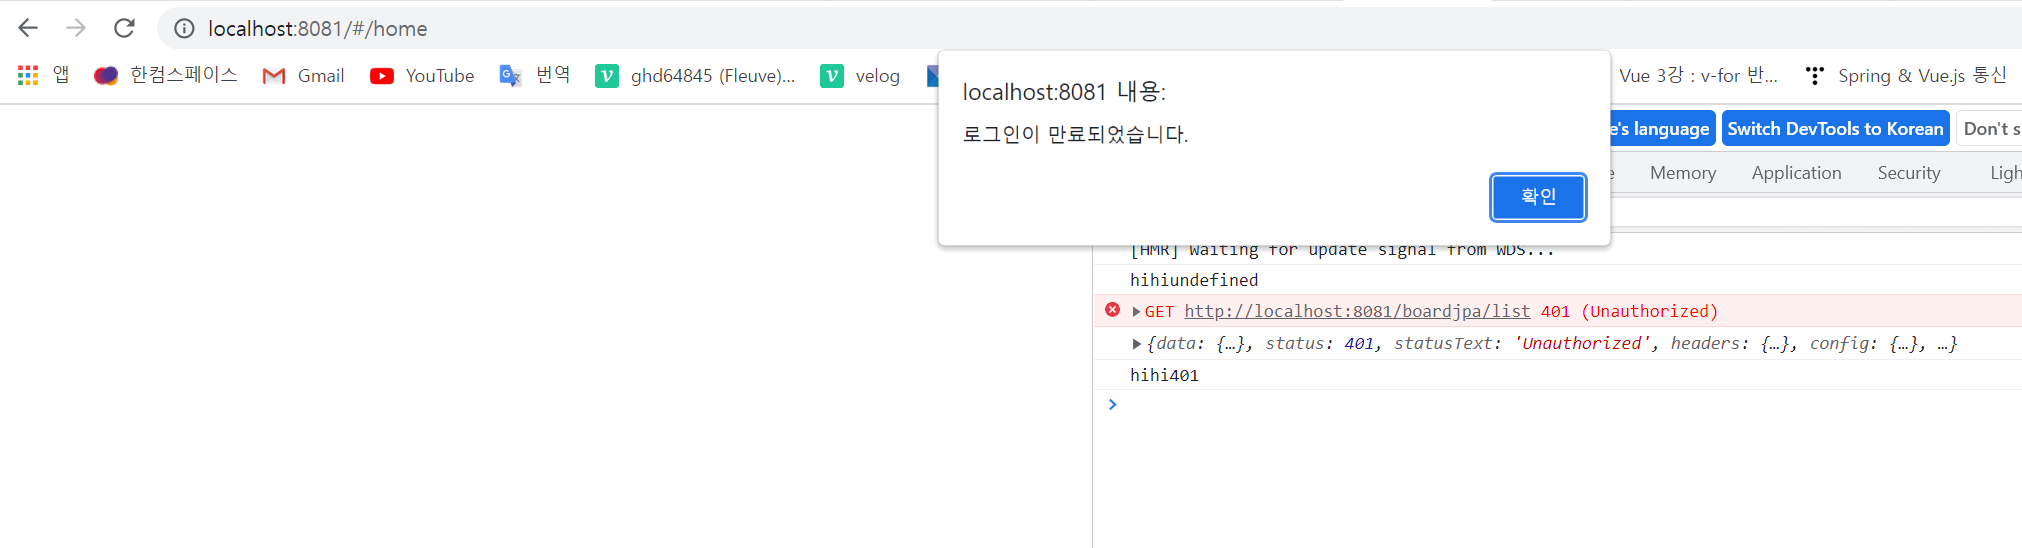
테스트를 위해서 token의 유효기간을 15초로 설정하고 새로고침을 눌러보았다.
Springboot에서 console을 Vue로 가지고 올 수 있다면 얼마나 좋을까. void형인 Filter를 바꿔봐야하나
아직까지 Vue에 대한 이해가 적어서 이렇게 밖에 구현을 못했다.
http헤더 설정(axios 인터셉터)상태를 관리하는 방법도 있는 것 같은데 다음에 로그인 기능을 구현할 때 다음 방법으로 구현하고 작성해보겠다.
'Vue > Vue' 카테고리의 다른 글
| (SignUp-1) 회원가입 구현하기 (0) | 2021.12.16 |
|---|---|
| (Login-3) axios 인터셉터 사용하기 (0) | 2021.12.15 |
| (Login-1) JWT 로그인 방식 (0) | 2021.12.08 |
| 10. 새로고침시 Vuex 상태 유지 (vuex-persistedstate) (0) | 2021.12.08 |
| 9. Vuex에 대해서 (0) | 2021.12.06 |


